Skip to content
Menu
INVENTgen
  • Home
  • ChatGPT
  • eCommerce
  • Hosting
  • Software
  • Tools
  • VPN
  • Templates
  • Themes
INVENTgen
How To Use Your USB Flash Drive as RAM_Processor Features

How To Use Your USB Flash Drive as RAM? A 13-Step Guide

Posted on March 22, 2024February 29, 2024

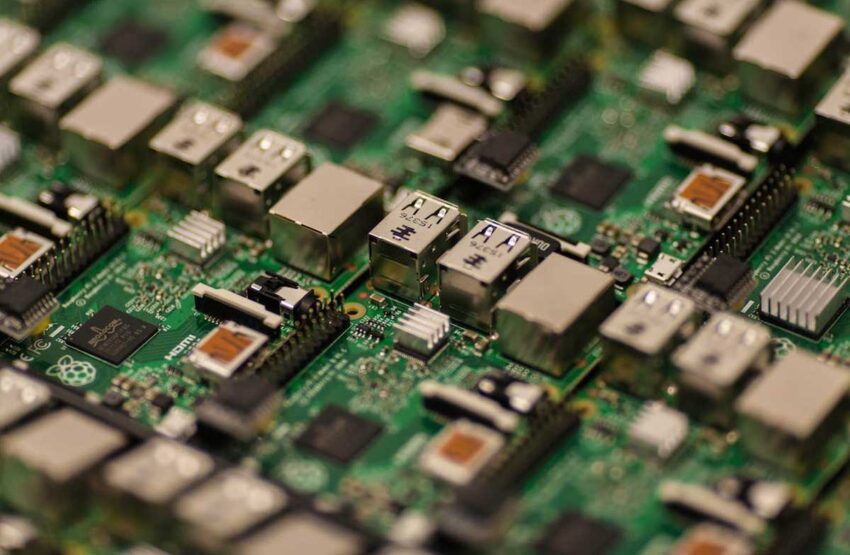
How to use your USB Flash Drive as RAM? In the realm of computing, RAM (Random Access Memory) stands as one of the vital components responsible for the speed and efficiency of a system. Its primary function is to temporarily store data that the CPU (Central Processing Unit) needs to access quickly, facilitating swift operations and multitasking. However, systems often encounter performance bottlenecks when RAM capacity is insufficient for the tasks at hand, leading to sluggishness and decreased productivity. To address this limitation, innovative methods have emerged, including the utilization of USB flash drives as virtual RAM extensions.

This ingenious solution involves leveraging the storage capabilities of USB flash drives to augment the existing RAM capacity of a system, effectively expanding its memory resources. By treating a USB flash drive as supplementary virtual memory, users can mitigate the constraints imposed by limited physical RAM. While USB flash drives traditionally serve as portable storage devices for files and applications, their potential to serve as auxiliary RAM presents a transformative opportunity to enhance system performance, particularly for systems with constrained resources.

How To Use Your USB Flash Drive as RAM? A 13-Step Guide

In this exploration, we delve into the mechanics of using a USB flash drive as RAM, discussing the benefits, considerations, and practical implementation of this approach. Through a detailed examination, we aim to uncover the feasibility and efficacy of this method in optimizing system performance and meeting the demands of modern computing tasks. Join us as we unlock the potential of USB flash drives in redefining the boundaries of system memory and ushering in a new era of computational efficiency.

1. Grasping the Concept: Enhancing Computer Performance

Understanding RAM: RAM, or Random Access Memory, is a critical component of computer memory responsible for temporarily storing data while the computer is in operation. It enables swift access to data required by the CPU, facilitating efficient multitasking and application performance.

Augmenting System Resources: Increasing the amount of RAM in your computer can significantly enhance its performance by providing additional space for running applications and handling concurrent tasks. This augmentation reduces reliance on slower storage devices, such as hard drives, leading to smoother operation and improved responsiveness.

Utilizing USB Flash Drive as Virtual RAM: By employing a USB flash drive as virtual RAM, colloquially referred to as “paging,” users can extend their computer’s available memory capacity. This technique involves using a portion of the USB drive’s storage space as a supplemental memory resource, effectively expanding the system’s memory pool.

2. Verifying Compatibility: Ensuring System Suitability

Assessing Operating System Support: Before proceeding, it’s crucial to verify whether your computer’s operating system supports utilizing a USB flash drive as virtual RAM. Most contemporary Windows and macOS systems offer compatibility with this functionality, albeit with varying degrees of implementation and optimization.

Hardware Compatibility Check: Additionally, ensure that your computer’s hardware configuration aligns with the requirements for leveraging a USB flash drive as virtual RAM. While many modern systems support this feature, older or specialized hardware configurations may exhibit limitations or incompatibilities.

System Specification Review: Conduct a thorough review of your computer’s specifications to ascertain compatibility with utilizing a USB flash drive as virtual RAM. Consult manufacturer documentation or online resources to confirm compatibility and identify any potential constraints or prerequisites.

3. Selecting the Appropriate USB Flash Drive: Optimize Performance

Prioritize High-Speed Interfaces: When choosing a USB flash drive for virtual RAM usage, prioritize models equipped with high-speed interfaces, such as USB 3.0 or USB-C. These interfaces facilitate rapid data transfer rates, ensuring optimal performance when functioning as supplemental memory.

Consider Storage Capacity: Evaluate the storage capacity of the USB flash drive, as it directly correlates with the amount of virtual RAM that can be added to your system. Opt for a drive with ample storage capacity to accommodate your computing requirements and support efficient multitasking without storage constraints.

Balance Performance and Capacity: Strike a balance between performance and capacity when selecting a USB flash drive for virtual RAM usage. While higher storage capacities offer greater flexibility, prioritize models with robust read/write speeds to enhance overall system responsiveness and efficiency.

4. Formatting the USB Flash Drive: Prepare for Integration

Format for Compatibility: Before deploying the USB flash drive as virtual RAM, it must be formatted to ensure compatibility with your computer’s operating system. Choose between the FAT32 or exFAT file systems, as they are widely supported across various platforms and are suitable for USB flash drives.

Backup Essential Data: Before formatting the USB flash drive, safeguard any essential data stored on the device by creating backups. Formatting will erase all existing data on the drive, necessitating precautionary measures to prevent data loss and preserve critical files.

Execute Formatting Procedure: Initiate the formatting process using the preferred file system format (FAT32 or exFAT) through your computer’s operating system interface. Follow on-screen prompts and guidelines to complete the formatting procedure, ensuring the USB flash drive is prepared for integration as virtual RAM.

5. Connecting the USB Flash Drive: Establishing Hardware Integration

Secure Connection: After formatting the USB flash drive, securely connect it to an available USB port on your computer. Ensure the connection is firm and stable to prevent any disruptions or disconnections during the subsequent setup process.

Recognition Verification: Upon connection, verify that your computer detects the USB flash drive. It should be promptly recognized and appear as a removable storage device within the file explorer or disk management utility of your operating system.

Functional Validation: Confirm the functionality of the USB flash drive by accessing its storage contents and verifying read/write capabilities. This ensures that the drive is operational and ready for integration as virtual RAM.

6. Accessing System Properties: Configuring Virtual RAM (Windows)

Navigate to System Properties: On a Windows computer, access the system properties settings to configure the USB flash drive as virtual RAM. Right-click on the desktop icon labeled “This PC” or “My Computer,” or navigate to it within the file explorer interface.

Select Properties: From the context menu, select “Properties” to initiate the system properties window. Alternatively, you can access system properties by right-clicking on the “This PC” or “My Computer” icon and selecting “Properties” from the dropdown menu.

Adjust Settings: Within the system properties window, navigate to the “Advanced system settings” option located on the left-hand side. Click on this option to access advanced system properties, including settings related to performance and hardware configurations.

Configure Virtual RAM: Within the advanced system properties menu, locate the “Performance” section and click on the “Settings” button. This will open the performance options window, where you can further navigate to the “Advanced” tab.

Modify Virtual Memory Settings: Under the “Advanced” tab, find the “Virtual Memory” section and click on the “Change” button. This will allow you to adjust virtual memory settings, including the configuration of virtual RAM using the connected USB flash drive.

Proceed with Setup: Follow on-screen instructions to configure virtual RAM settings, specifying the USB flash drive as a supplemental memory source. Customize the allocation size and other parameters as desired, and confirm your selections to finalize the setup process.

System Restart: Upon completion, restart your computer to apply the changes and enable the utilization of the USB flash drive as virtual RAM. Once rebooted, your system should benefit from the augmented memory capacity, enhancing performance and multitasking capabilities.

7. Accessing Advanced System Settings: Navigating System Configuration

Initiating System Properties: Open the system properties window on your Windows computer by right-clicking on the “This PC” or “My Computer” icon and selecting “Properties” from the context menu. Alternatively, access system properties through the Control Panel by navigating to “System and Security” > “System.”

Locating Advanced Settings: Within the system properties window, navigate to the “Advanced” tab or section. This section typically contains advanced settings related to system performance, hardware, and virtual memory management.

Accessing Performance Options: Look for the “Settings” button or link under the “Performance” category. Clicking on this button will open the performance options window, providing access to various settings for optimizing system performance and visual effects.

8. Modifying Virtual Memory Settings: Configuring Paging File

Navigating to Virtual Memory Settings: In the performance options window, switch to the “Advanced” tab or section, where you’ll find settings related to virtual memory management. Look for the “Virtual Memory” category or section within this tab.

Adjusting Virtual Memory Configuration: Locate the “Change” button or link under the “Virtual Memory” category. Clicking on this button will open the virtual memory settings window, allowing you to modify the size of the paging file used for virtual memory operations.

Customizing Paging File Size: Within the virtual memory settings window, you can customize the size of the paging file according to your preferences and system requirements. Specify the desired size for the paging file, taking into account factors such as available disk space and memory usage patterns.

Applying Changes: After adjusting the virtual memory settings, click “OK” or “Apply” to apply the changes and exit the virtual memory settings window. Confirm any prompts or warnings that may appear during the configuration process.

Rebooting System: Restart your computer to apply the changes to the virtual memory configuration. Upon rebooting, your system will utilize the adjusted paging file size, potentially improving overall system performance and stability.

9. Choosing the USB Flash Drive: Designating Virtual RAM Source

Accessing Virtual Memory Settings: Within the virtual memory settings window, review the list of available drives and their associated paging file sizes. This window allows you to designate the USB flash drive as a source for virtual RAM utilization.

Locating USB Flash Drive: Scan the list of drives to locate the USB flash drive connected earlier. Identify the drive by its label or assigned drive letter, ensuring it is selected for virtual memory configuration. How AI, ChatGPT maximizes earnings of many people in minutes

Enabling Custom Sizing: Click once on the USB flash drive to select it, then proceed to enable manual configuration of the paging file size. This involves checking the box next to “Custom size,” granting you control over the allocation of virtual memory on the selected drive.

10. Defining Paging File Dimensions: Tailoring Virtual Memory Allocation

Determining Optimal Size: With custom sizing enabled, determine the appropriate initial and maximum sizes for the paging file on the USB flash drive. The recommended size typically ranges from 1.5 to 2 times the amount of physical RAM installed on your computer, though adjustments may be necessary based on specific system requirements and usage patterns.

Entering Size Values: Input the desired initial and maximum sizes for the paging file in the corresponding fields provided. Carefully consider the available storage space on the USB flash drive and the overall memory demands of your system when specifying these values.

Validation and Confirmation: After entering the desired size values, review your selections to ensure they align with your system’s requirements and available resources. Double-check the entered values for accuracy before proceeding to apply the changes. Motivation – Mind – Success – Thinking – Productivity – Happiness

Finalizing Configuration: Once satisfied with the specified paging file dimensions, confirm your selections by clicking “OK” or “Apply” within the virtual memory settings window. Any changes made to the paging file configuration will take effect upon confirmation.

Restarting System: To implement the newly configured virtual memory settings, restart your computer as prompted. Upon rebooting, your system will leverage the USB flash drive as supplemental virtual RAM, potentially enhancing overall performance and multitasking capabilities.

11. Confirming Changes: Saving Configuration Adjustments

Finalizing Configuration: Upon completing the adjustment of the paging file size for the USB flash drive, click on the “OK” or “Apply” button within the virtual memory settings window. This action saves your modifications and exits the settings interface, ensuring that the newly configured virtual RAM settings are applied to your system. Business – Money Making – Marketing – E-commerce

Prompted Restart: Depending on your system’s configuration and the operating system version, you may receive a prompt to restart your computer for the changes to take effect. It’s essential to heed this prompt and initiate a system restart to implement the configured virtual memory settings successfully.

Preparation for Restart: Before proceeding with the system restart, ensure that you save any open files and close running programs to prevent data loss or disruption. Take note of any unsaved changes and complete necessary tasks to facilitate a smooth transition during the restart process.

12. Finalizing Configuration: Initiating System Reboot

Commencing System Restart: Following the application of virtual memory configuration changes, proceed to restart your computer to finalize the setup process. Click on the “Restart” option provided in the prompt or initiate a manual restart through the system menu.

Recognition of USB Flash Drive: During the boot process, your computer will recognize the USB flash drive configured as virtual RAM and integrate it into the system’s memory architecture. This enables the USB flash drive to function as supplemental memory, augmenting your system’s existing RAM capacity. Health books, guides, exercises, habits, Diets, and more

Verification of Virtual RAM Usage: After restarting your computer, you can verify the utilization of the USB flash drive as virtual RAM through system properties or task manager utilities. Monitor memory usage metrics to confirm the effective integration and operation of the USB flash drive in enhancing system performance and multitasking capabilities.

Optimized System Performance: With the USB flash drive successfully configured as virtual RAM and integrated into your system, experience potential improvements in overall system responsiveness, application performance, and multitasking efficiency. Enjoy enhanced computing capabilities facilitated by the expanded memory resources provided by the supplemental virtual RAM.

13. Evaluating System Performance: Assessing the Impact of Virtual RAM

Observing Performance Metrics: Following the establishment of the USB flash drive as virtual RAM, closely monitor your computer’s performance to gauge any discernible enhancements in speed and responsiveness. Pay particular attention to system responsiveness during memory-intensive tasks or while running demanding applications. Fitness – Meditation – Diet – Weight Loss – Healthy Living – Yoga

Performance Comparison: Compare the system’s performance before and after implementing the USB flash drive as virtual RAM to ascertain any noticeable improvements. Evaluate factors such as application load times, multitasking efficiency, and overall system responsiveness to gauge the effectiveness of the virtual RAM configuration.

Understanding Limitations: Acknowledge that while utilizing a USB flash drive as virtual RAM can enhance performance, its efficacy may vary depending on factors such as the drive’s speed, capacity, and interface. Recognize that virtual RAM augmentation may not yield the same performance gains as installing additional physical RAM.

Consideration of Upgrades: If your computing needs demand consistently high performance for resource-intensive tasks or applications, consider upgrading your computer’s physical RAM. Increasing the amount of installed RAM provides a more robust and sustainable solution for enhancing system performance, surpassing the limitations of virtual RAM configurations. RPM 3.0 – 60% CONVERSION & Money for Affiliate Marketing

Strategic Decision-Making: Assess the performance improvements gained from virtual RAM usage against your computing requirements and budget constraints. Make informed decisions regarding potential RAM upgrades based on a thorough understanding of your system’s performance demands and available resources.

Iterative Optimization: Continuously monitor and optimize your system’s configuration to maintain peak performance levels. Regularly reassess your computing needs and explore opportunities for further enhancements, whether through virtual RAM utilization, RAM upgrades, or other performance optimization strategies.

Other Interesting Articles

  • How to Become a Data Analyst: A Step by Steps Guide
  • 4 Tips to Remove Personal Information from Internet Sources
  • What Is Shoulder Surfing and How Do You Prevent It?
  • How to Migrate from HTTP to HTTPS: A Complete Guide
  • How to Keep Businesses and Employees Safe Online
  • 8 Smart Ways to Protect Your Child, Kid, or Teen Online
  • How to Work from Home with Optimum Online Security
  • What is a Nameserver? Why are Nameservers Important?
  • Software Testing Documentation Guide: Why It’s Important
  • 15 Tips on How to Get Millions of Traffic to Your Website
  • How to Fix the ‘Your Connection Is Not Private’ Error
  • 7 Signs That A Software Project is in Trouble: How To Solve
  • 12 Climate Tech Investment Trends Prove More Resilient
  • How to Do an Online Bachelor’s in Entertainment Management
  • 16 Awesome Benefits of a Digital Classroom for Students
  • 13 Trends of Internet of Things Digital Transformation
  • How Can I Become A Successful Youtuber in 10 Steps
  • What is Website Monitoring and Why is it Important?
  • 11 Top Emerging Cloud Computing Trends to Follow
  • 5 Benefits of Cloud-Based Custom App Development

Leave a Reply Cancel reply

Your email address will not be published. Required fields are marked *

  • About
  • Affiliate Disclaimer
  • Contact
  • Privacy Policy

Archives

  • June 2024
  • May 2024
  • April 2024
  • March 2024
  • February 2024
  • January 2024
  • December 2023
  • November 2023
  • October 2023
  • September 2023
  • May 2023
  • February 2023
  • April 2022
  • October 2021
  • September 2021
  • August 2021
  • July 2021
  • June 2021
  • September 2020

Categories

  • Automobile
  • Business
  • Education
  • Industrial
  • Innovation
  • Interesting Facts
  • Science
  • Security
  • Software
  • Technology

Recent Posts

  • How To Implement APIs for a Company: Step-By-Step Guide
  • 14 Innovations Blockchain Technology Pushing in Logistics Sector
  • Transfer a Project To Another Development Agency: 14 Steps
  • 15 Sure-Shot Tips To Make Your Agile Team Efficient
  • 13 Fresh Tips To Comply with the New Privacy Legislation

Recent Comments

    Archives

    • June 2024
    • May 2024
    • April 2024
    • March 2024
    • February 2024
    • January 2024
    • December 2023
    • November 2023
    • October 2023
    • September 2023
    • May 2023
    • February 2023
    • April 2022
    • October 2021
    • September 2021
    • August 2021
    • July 2021
    • June 2021
    • September 2020
    ©2025 INVENTgen | Powered by SuperbThemes!